1. Installed SLES 11 on my Lenovo Thinkpad T61p.
2. Install the SLES 11 Xen hypervisor. YaST -> Virtualization -> Install Hypervisor and Tools. Reboot the machine into the SLES 11 Xen-kernel. Configure a local network bridge so that virtual machines and the host can communicate via TCP/IP. For details, see my other entry at http://sellingfreesoftwareforaliving.blogspot.com/2008/06/simple-nat-with-xen-setup.html
3. Create and install SLES 11 as a new virtual machine (domU) called WebSrv. Install the Apache2 web server (installation pattern: Web and LAMP Server) and the Mono extension (post-installation).
The Mono extension can be downloaded from http://download.novell.com, select SUSE Linux Enterprise Mono Extension and click Search. Alternatively, the direct link (at the time of this writing) is HERE. Installation of the Mono is fairly straight forward YaST -> Software -> Add-On Products and select the ISO file that has been downloaded.
4. Create and install a Windows virtual machine (domU) called WinDev. I have used Windows Server 2003 and Windows Vista. You can also use Windows XP... as long as its a platform where we can install Visual Studio 2008 Standard Edition. See this link for installation requirements HERE.
5. Download and install Visual Studio 2008 Standard Edition onto the Windows virtual machine (WinDev) created previously. Visual Studio 2008 can be downloaded as a trial (90 days) HERE ... even better if you have an MSDN subscription and you can use this without worrying about expiration of your trial licence.
6. Download the freely available .NET ASPX web application called BlogEngine.NET (source) from http://www.dotnetblogengine.net/ into the Windows virtual machine. Latest version (at time of this entry) is V1.5. Optionally, you might want to refer to their online video on how to download and install this on Visual Studio HERE.
7. Start Visual Studio 2008 and import the BlogEngine.NET application (source). From the Solution Explorer, collapse the tree and right-click on the BlogEngine.Web folder and select Set as Startup Project.
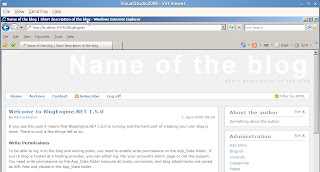
8. Test that the BlogEngine.NET application works by hitting Ctrl-F5 or Menu Bar -> Debug -> Start without Debugging. If successful, the IE browser will launch and you will see the start page for the BlogEngine webapp. Close IE to end the debugging session within Visual Studio 2008.

9. On the SLES 11 virtual machine (WebSrv), create a sub-directory called BlogEngine in /srv/www/htdocs/ and share this directory via SAMBA (with read and write access), YaST -> Network Services -> Samba Server.
10. On the Windows virtual machine (WinDev), map the shared directory from SLES 11 (WebSrv) as Z: drive.
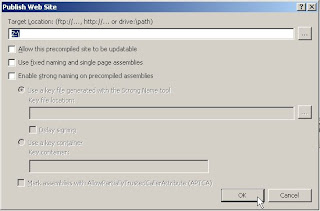
11. Export the BlogEngine.NET application to Z: drive via Menu Bar -> Build -> Publish Website. See screenshot below. The initial publishing will take some time as compilation is required.

13. Point your IE browser to http://[WebSrv]/BlogEngine , where [WebSrv] is the IP address or resolvable hostname of the SLES 11 virtual machine, and verify that the .NET ASPX application works!
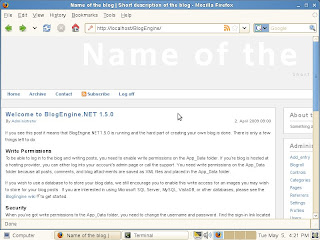
If so, go to SLES 11 (WebSrv) and open a Firefox browser to http://localhost/BlogEngine and verify the .NET ASPX web application loads.

DONE!
On the Windows virtual machine (WinDev), map the shared directory from SLES 11 (WebSrv) as Z: drive. - please, explain this step more detaily
ReplyDeleteessay writing